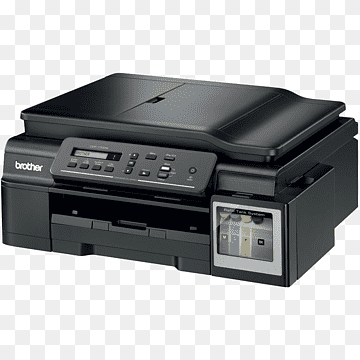
How to connect Brother printer to wifi
Connecting a Brother printer to Wi-Fi may be a straightforward manner if you comply with the right steps. This guide will walk you through the procedure, making sure your printer is up and running on your wireless network in no time. Let’s break down the steps into clear, attainable parts:
Preparation
Before you start, ensure you have the following:
- A wireless network (Wi-Fi) with a working internet connection.
- Your Wi-Fi network name (SSID) and password.
- The Brother printer powered on and within range of your Wi-Fi router.
Using the Control Panel to Connect to Wi-Fi
Step 1: Turn On Your Printer
Press the power button to turn on your Brother printer. Ensure it is fully operational before proceeding to the next steps.
Step 2: Access the Settings Menu
Navigate to the printer’s control panel. This varies slightly depending on your printer model, but typically, you’ll find a “Menu” or “Settings” button.
Step 3: Select Network Settings
Once inside the menu, look for “Network” settings. On most models, you might need to use the arrow keys to scroll through options.
Step 4: Choose WLAN
Within the Network settings, select “WLAN” or “Wireless LAN” to start the Wi-Fi setup process.
Step 5: Set Up Wizard
Choose the “Setup Wizard” option. The printer will start searching for available wireless networks.
Step 6: Select Your Network
From the list of available networks, select your Wi-Fi network name (SSID). If your network does not appear, ensure the printer is within range of the router and that the Wi-Fi signal is strong.
Step 7: Enter the Wi-Fi Password
After selecting your network, you will be prompted to enter the Wi-Fi password. Use the keypad to input the password accurately. Double-check to avoid any mistakes.
Step 8: Confirm Connection
Once the password is entered, the printer will attempt to connect to the Wi-Fi network. This may take a few moments. Once connected, a confirmation message should appear on the printer’s screen.
Using WPS (Wi-Fi Protected Setup)
If your router supports WPS, connecting your Brother printer can be even easier.
Step 1: Turn On Your Printer
Ensure your printer is on and ready for setup.
Step 2: Activate WPS on Your Router
Press the WPS button on your router. This button is usually labeled “WPS” and may need to be held for a few seconds. Consult your router’s manual if you are unsure of its location.
Step 3: Activate WPS on Your Printer
Within two minutes of pressing the WPS button on your router, go to your printer’s control panel. Navigate to the “WLAN” settings and select “WPS.” The printer will attempt to connect to your Wi-Fi network.
Step 4: Confirmation
Once connected, the printer’s display should confirm the connection. You can now print wirelessly.
Installing Printer Drivers and Software
To complete the setup, you’ll need to install the necessary drivers and software on your computer.
Step 1: Visit the Brother Support Website
Go to the official website and navigate to the Brother printer support section.
Step 2: Download Drivers
Enter your printer model number to find the correct drivers and software. Download the latest versions compatible with your operating system (Windows, macOS, etc.).
Step 3: Install Software
Run the downloaded installation file and follow the on-screen instructions. The installation wizard will guide you through the process, including detecting the printer on the network.
Troubleshooting
If you encounter issues, here are some troubleshooting tips:
Step 1: Check Network Settings
Ensure your Wi-Fi network is working properly. Try connecting another device to the network to verify.
Step 2: Restart Devices
Sometimes, simply restarting your printer, computer, and router can resolve connectivity issues.
Step 3: Signal Strength
Ensure the printer is within range of the Wi-Fi router. Physical obstructions and distance can affect signal strength.
Step 4: Re-enter Password
Double-check that the Wi-Fi password entered on the printer is correct.
Step 5: Update Firmware
Ensure your printer’s firmware is updated. This can often be done through the Brother printer’s settings menu.
Connecting to Multiple Devices
Once your Brother printer is connected to the Wi-Fi network, it can be used by multiple devices within the same network.
Step 1: On a Computer
Go to your computer’s “Printers & Scanners” settings. Select “Add a printer” and your Brother printer should appear in the list of available devices. Select it and follow any additional prompts to complete the setup.
Step 2: On Mobile Devices
For mobile devices, download the Brother iPrint&Scan app from the App Store (iOS) or Google Play Store (Android). Open the app, ensure your mobile device is connected to the same Wi-Fi network as the printer, and follow the in-app instructions to add your printer.
Advanced Settings
For advanced users, Brother printers offer additional network settings that can be customized through the printer’s web interface.
Step 1: Access the Web Interface
Find the printer’s IP address by printing a network configuration page (usually available in the printer’s settings menu). Enter this IP address into a web browser on a computer connected to the same network.
Step 2: Login
Log in using the default credentials (often found in the printer’s manual or on the Brother website).
Step 3: Customize Settings
From here, you can customize various network settings, such as setting a static IP address, configuring security options, or enabling additional features like AirPrint or Google Cloud Print.
Conclusion
Connecting a Brother printer to Wi-Fi involves a few clear steps. Whether using the control panel, WPS, or advanced settings, ensuring a stable network connection is key. Once connected, you can enjoy the convenience of wireless printing from multiple devices. Should you encounter any issues, troubleshooting tips can help resolve Brother printer common problems. With your Brother printer connected to Wi-Fi, you can experience enhanced productivity and flexibility in your printing tasks.

